Assembly
Contents
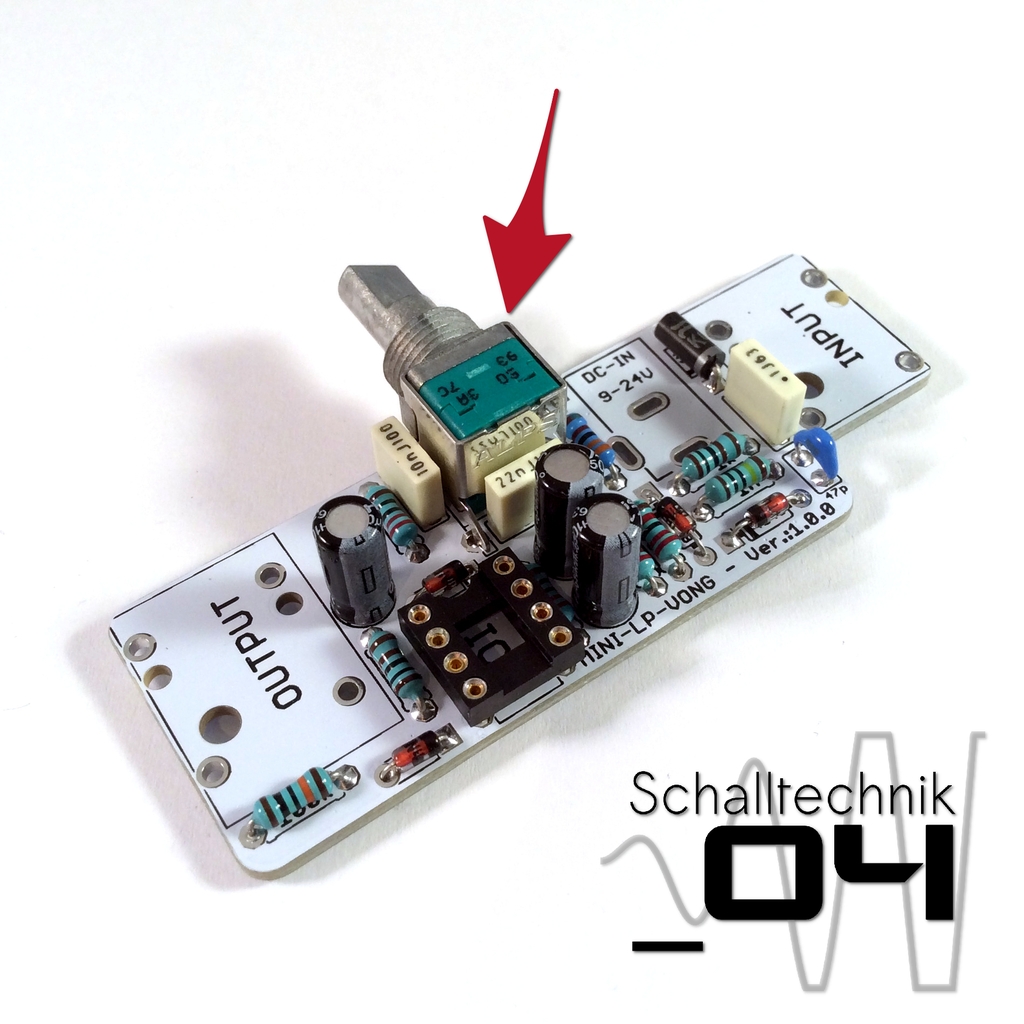 Insert print pot (2x50kA log print) and solder it. The pots needs to sit completely flush on the surface of the pcb!
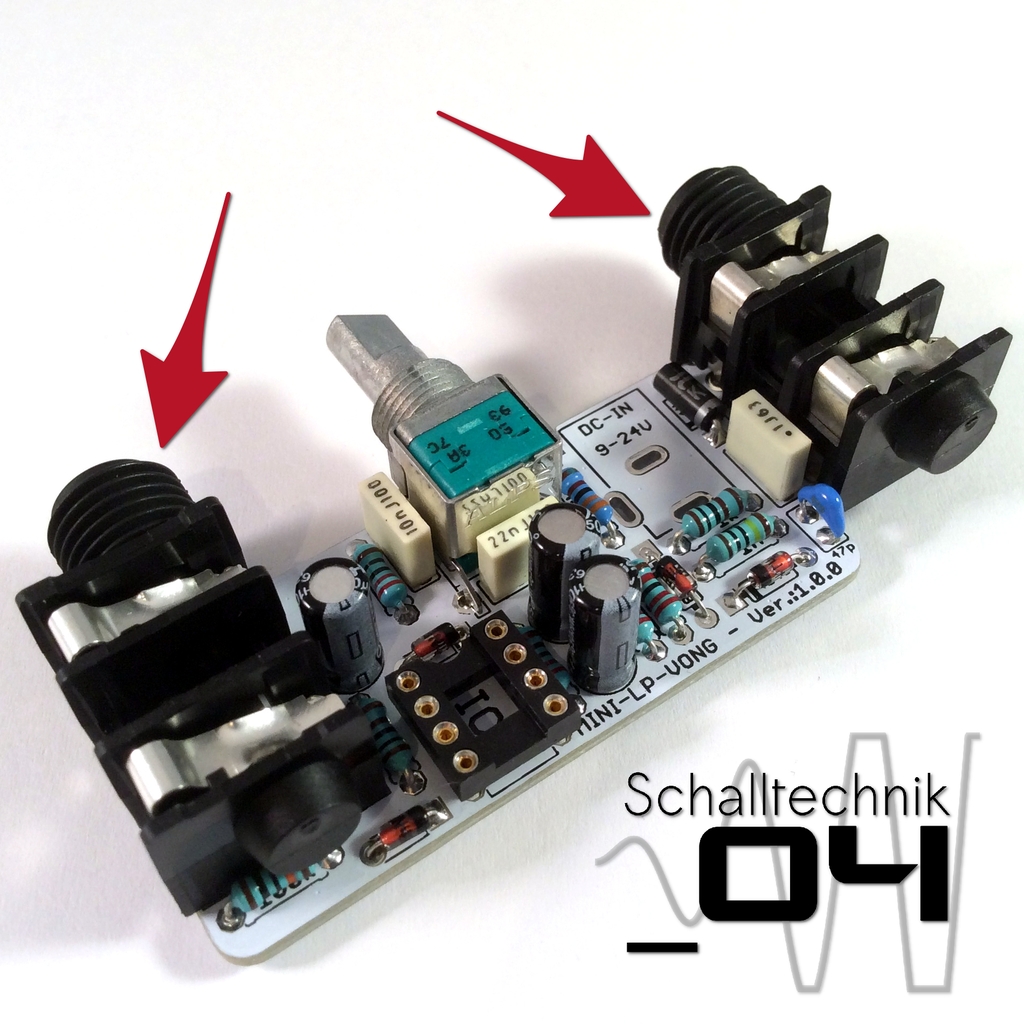
Insert jacks and solder them. The jacks need to sit completely flush on the surface of the pcb!
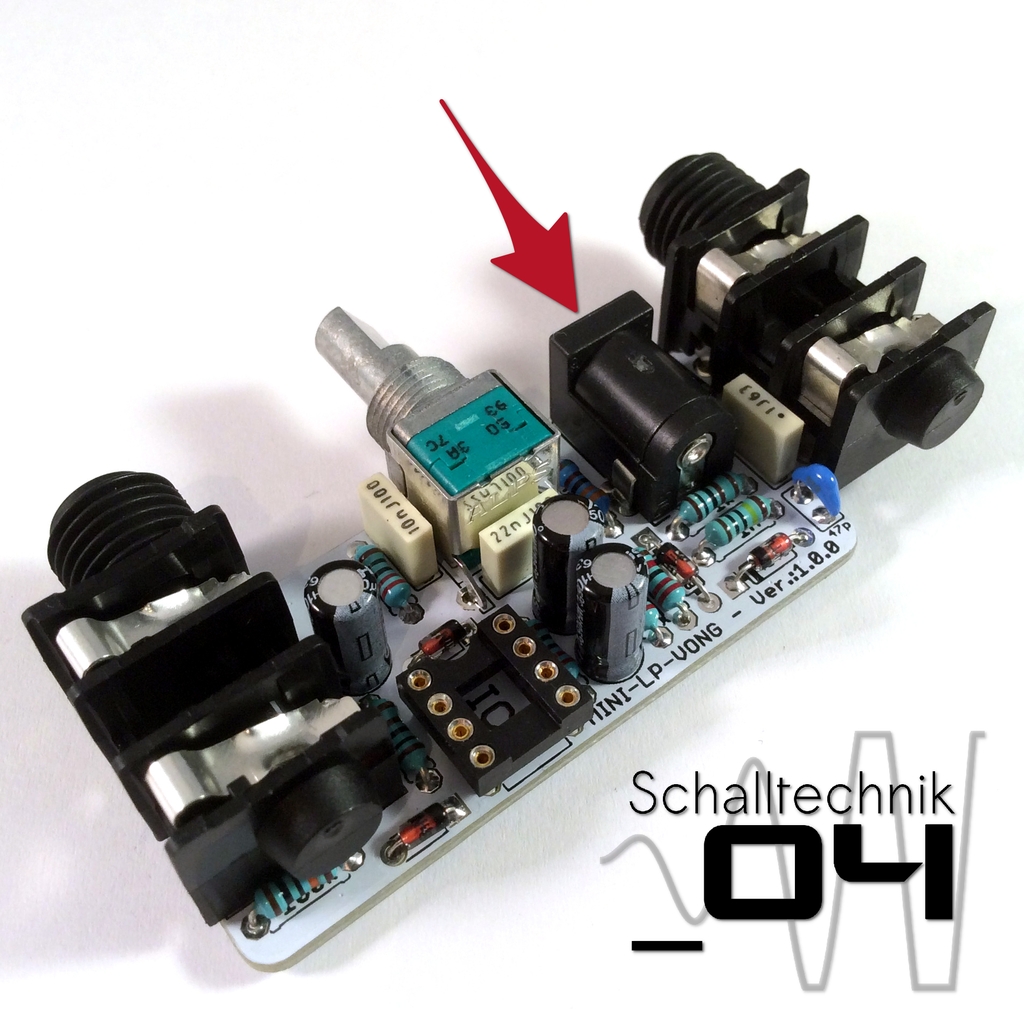
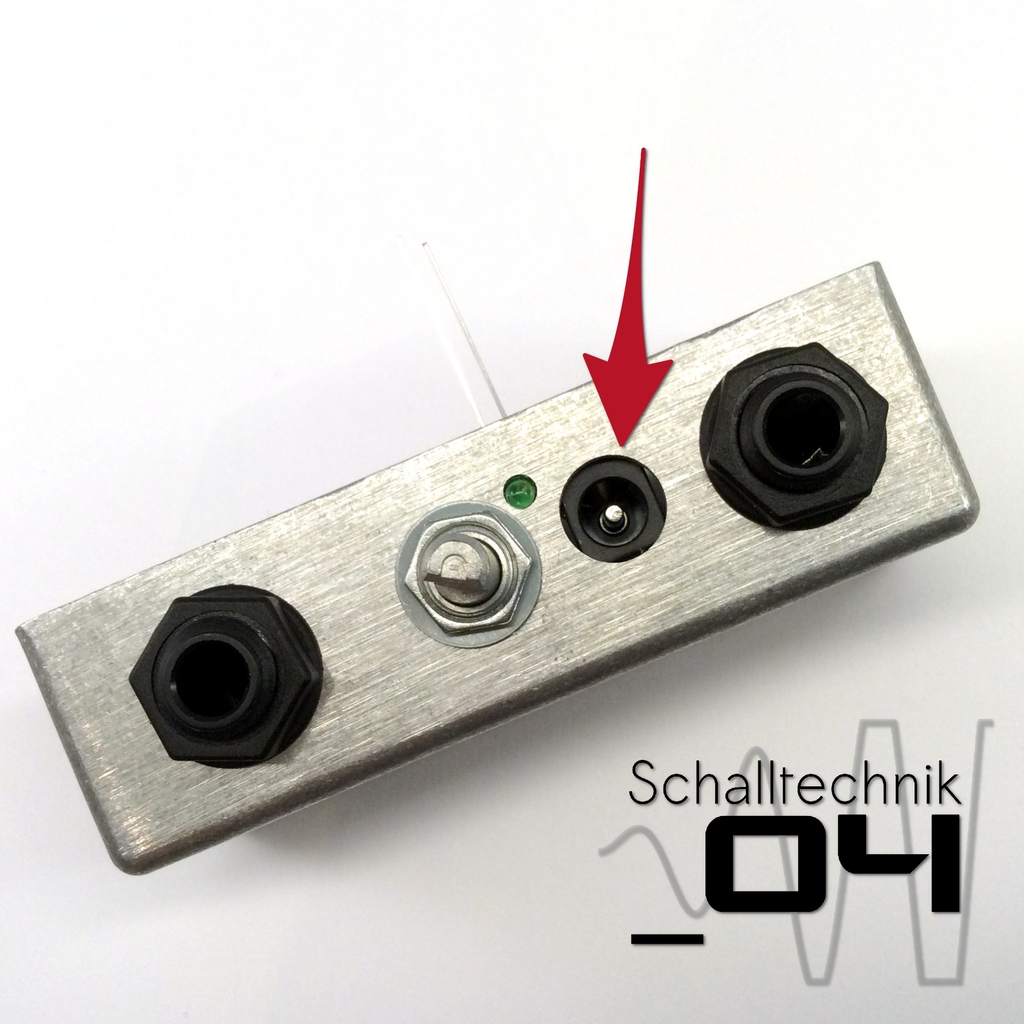
Insert and solder dc-in-jack to the PCB.
Take care that it is soldered in straight!
 Insert TL072 (1x). Align correctly!
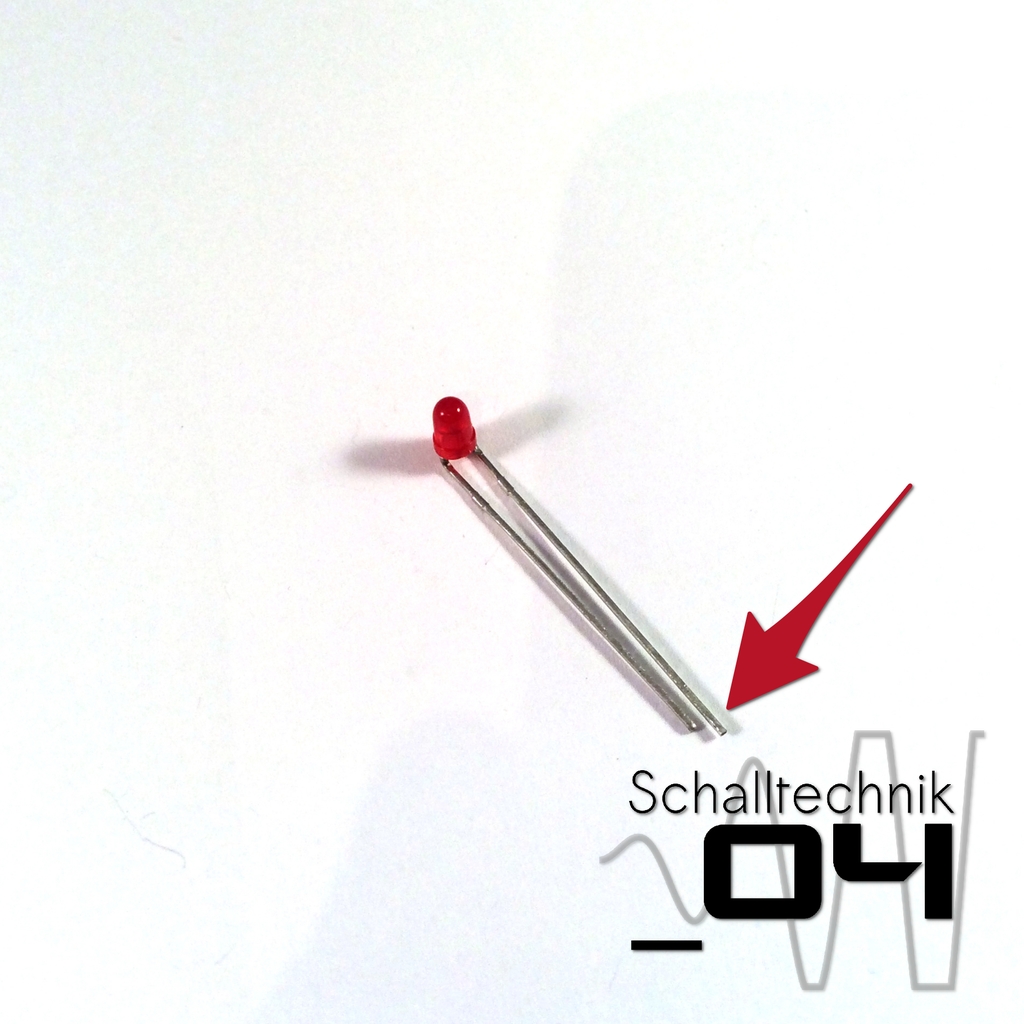 Bend the legs of the led as shown in the picture above.
If you look into the lens of the LED and legs show downwards (towards you), the longer leg needs to be on the right side. Otherwise it wasn’t bent correctly!
 Insert the led into the pcb but don’t solder, yet!
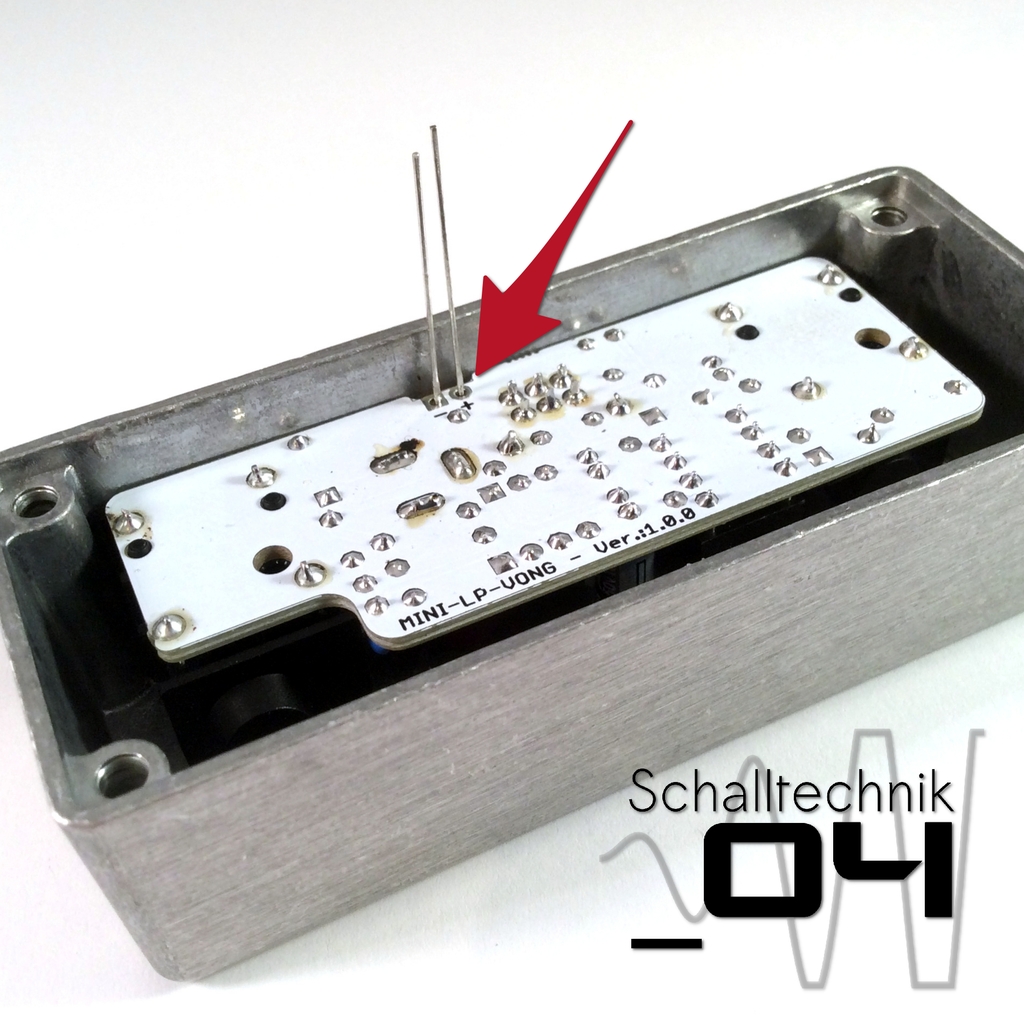
If the legs were bent correct, the longer leg of the led is now within the “+” marked land.
 Mount the pcb together with the led into the enclosure. Align so that the dc-in-jack is in the center of its hole.
 Now solder the led to the pcb.

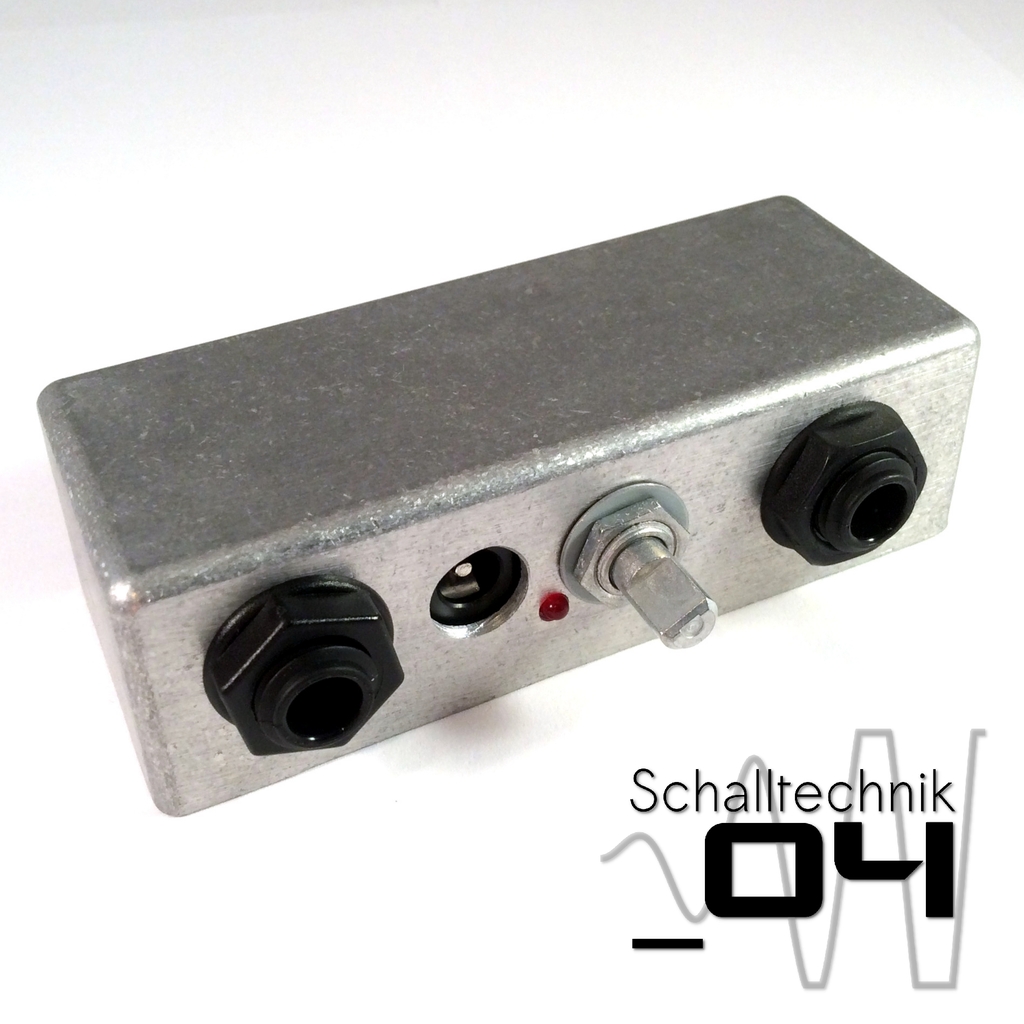 You can test it now!
 Carefully clean away the remaining flux on solder joints.
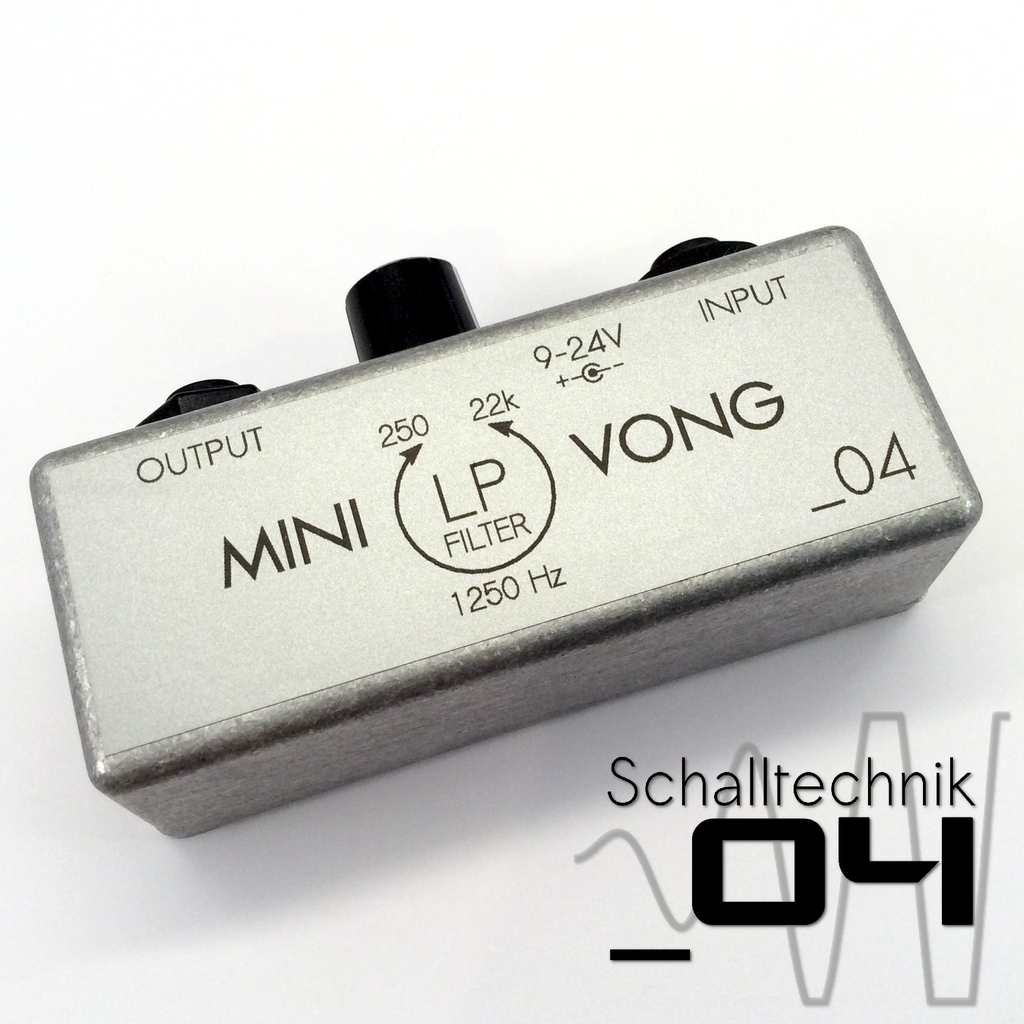
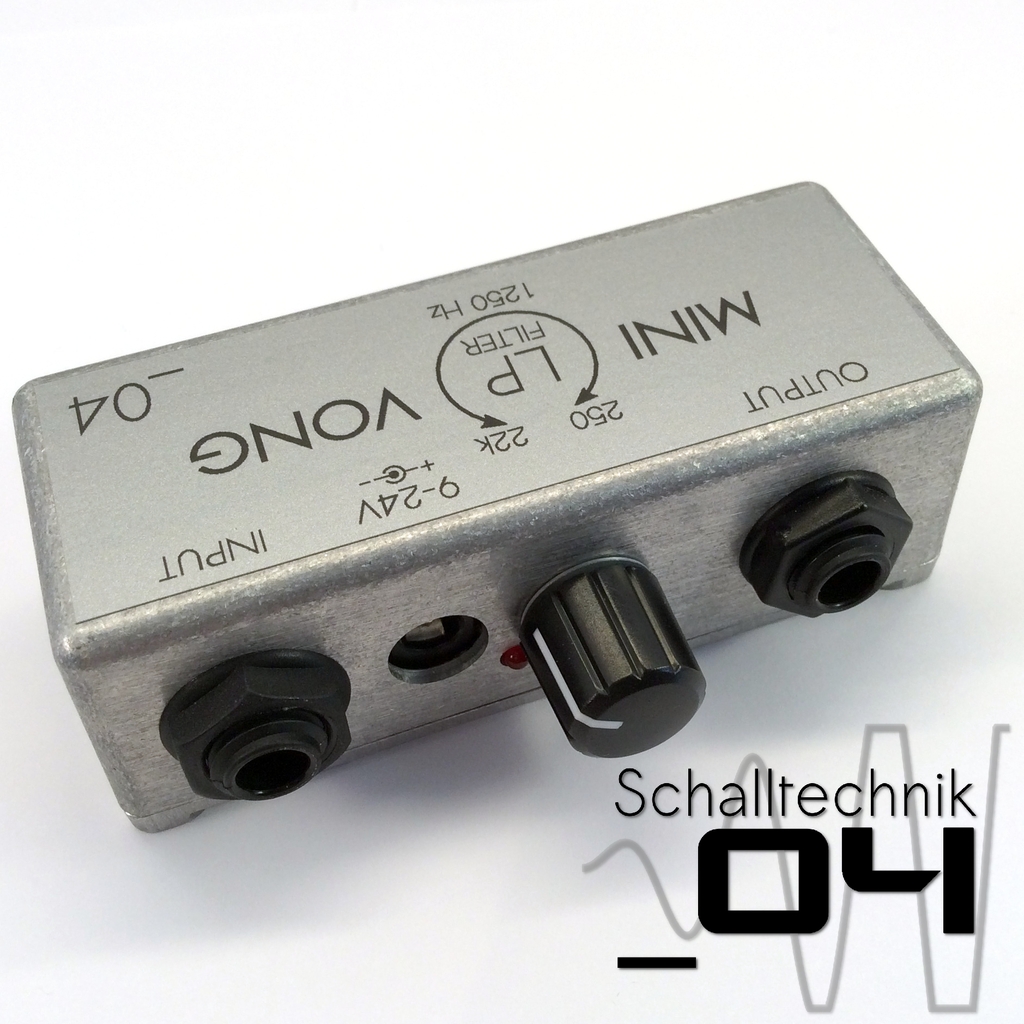
If given, add the sticker to the enclosure and add the knob.
Note:The enclosure comes with self-cutting screws. So a little bit more force is needed the first time you screw them in.