PCB-assembly 1/2
Contents
HALT! STOP!
Are you starting to assemble a kit bought not directly from schalltechnik_04.de? If yes, check every part again the list of parts.
Really! E.V.E.R.Y. Part!
If anything is wrong -> contact your seller!
If you’re not certain, if it is the correct part -> contact us.
It’s 10 mins invested, that will later safe you headaches.
HALT! STOP!
With that out of the way, let’s start building. 🙂 First we start with the bare pcb and insert the first parts.
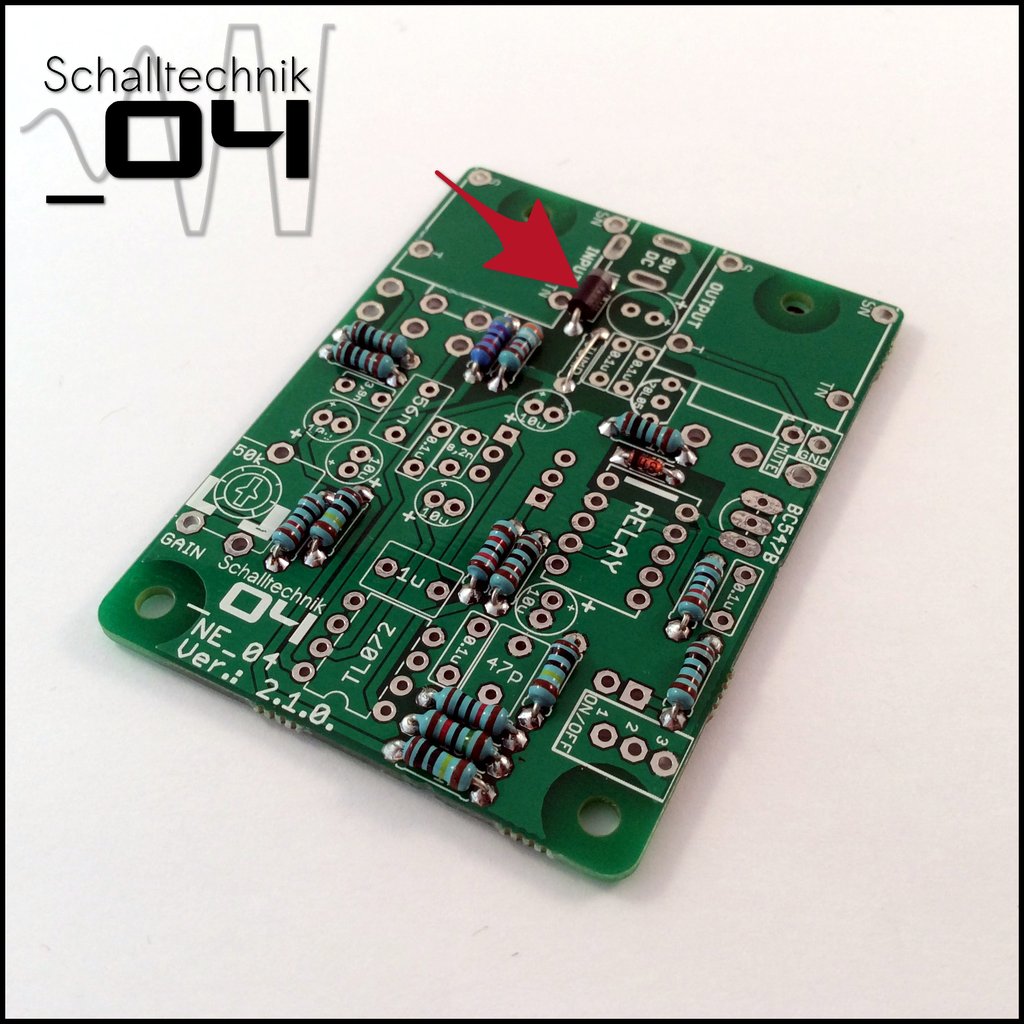
 Insert 1N4148 diode (1x) and solder it. Align correctly!
Sometimes the marking on the silkscreen isn’t very good to see.
Luckily the land has different shapes. The Cathode (the side with marking) comes in the hole with the square land. (see picture above)
 Now use a piece of wire (e.g. one from the 1N4148 diode) and put it in the place named “JUMP”. If you are using a very bad noisy power supply you can replace the wire with a small value resistor (like 100 Ohm). The resistor in conjunction with the 10µF caps will result in a low pass filter for the power rail. It kind of “isolates” the audio-path of the effect from the rest of the circuit. Usually this step isn’t needed at all! If you consider to insert a resistor in instead of the wire. Please contact us first.
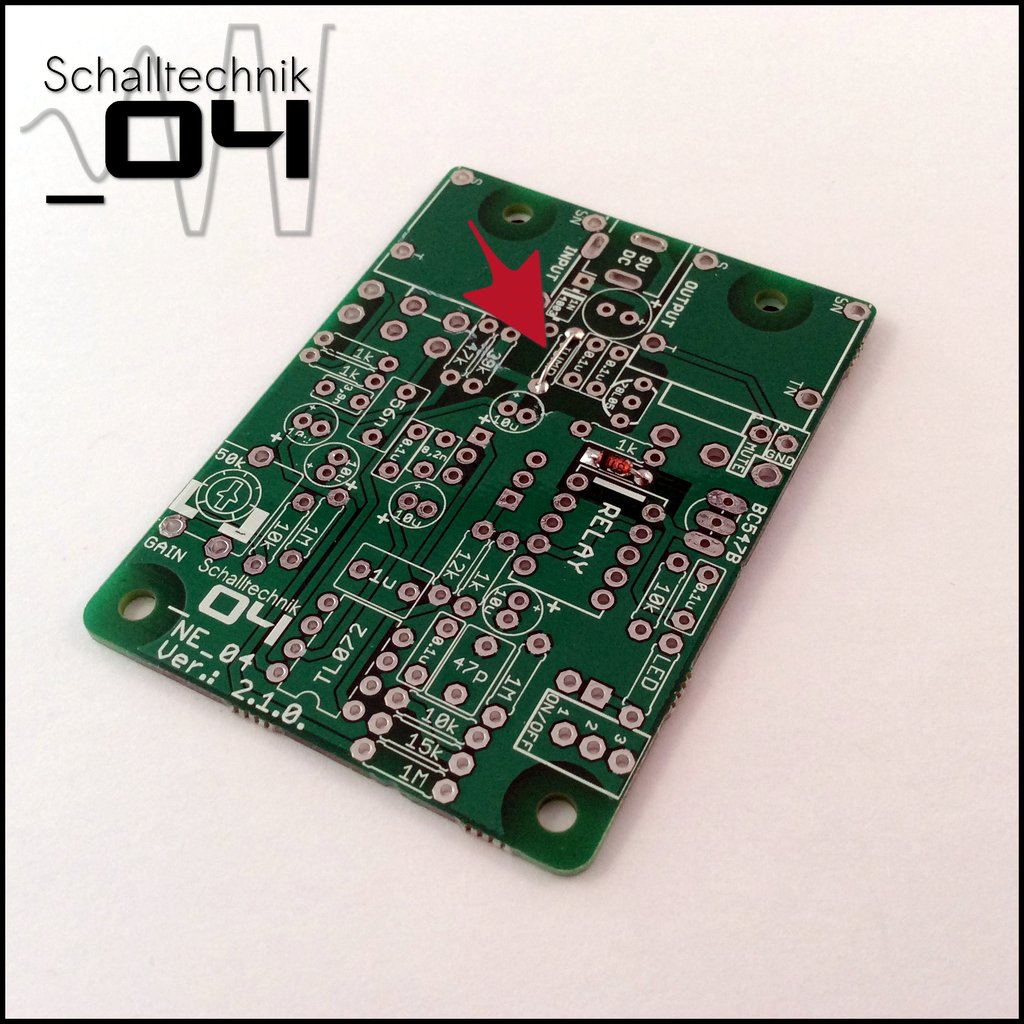
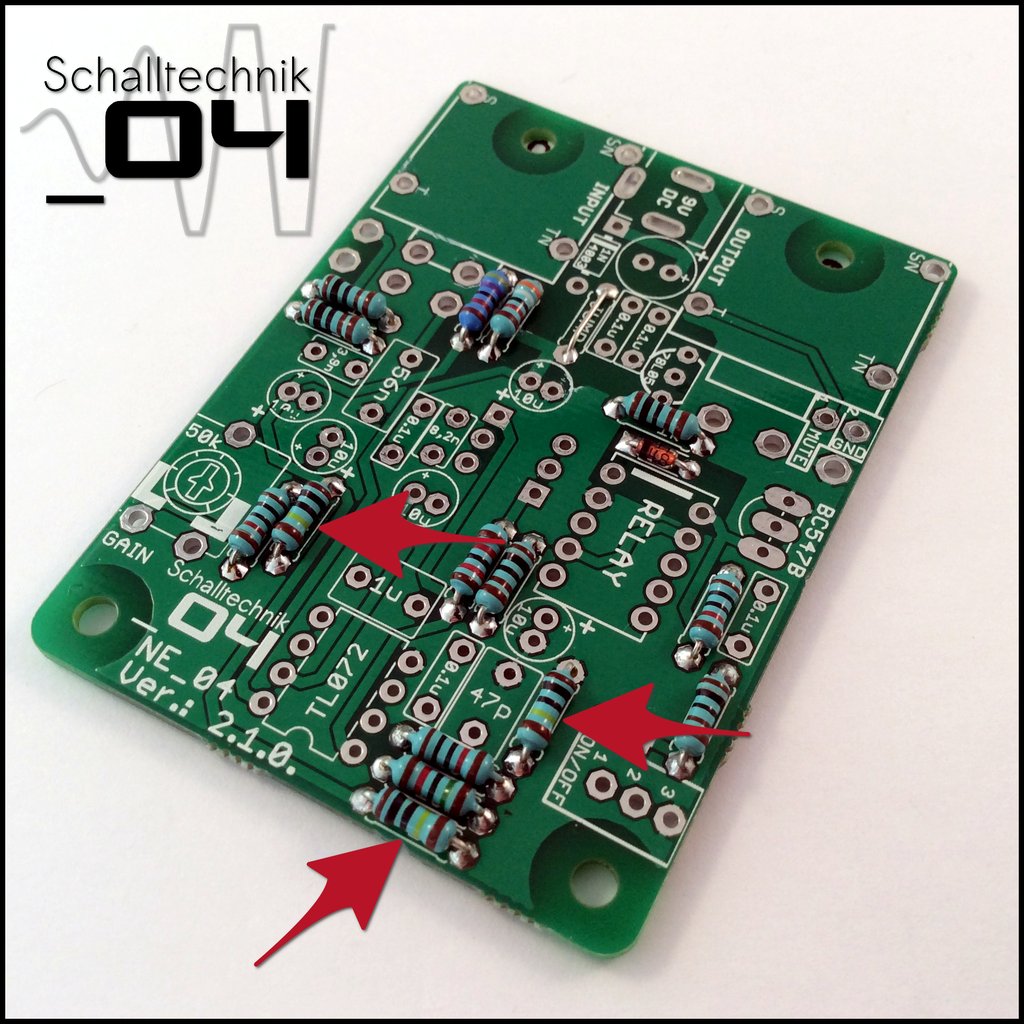
 Insert the 1k resistors (4x) and the one for the led (here also 1k) and solder them.
 Insert 10k resistors (3x) and solder them.
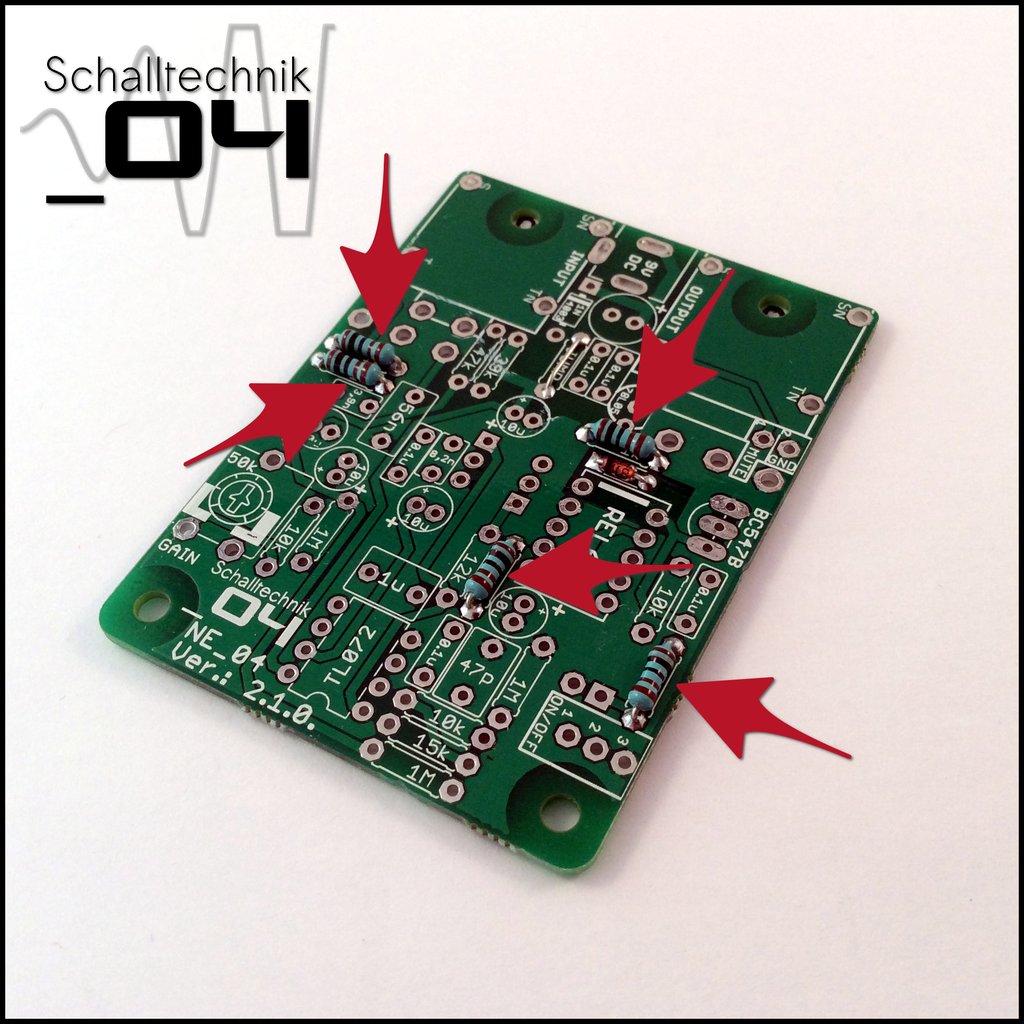
 Insert 12k resistor (1x) and solder it.
 Insert 15k resistor (1x) and solder it.
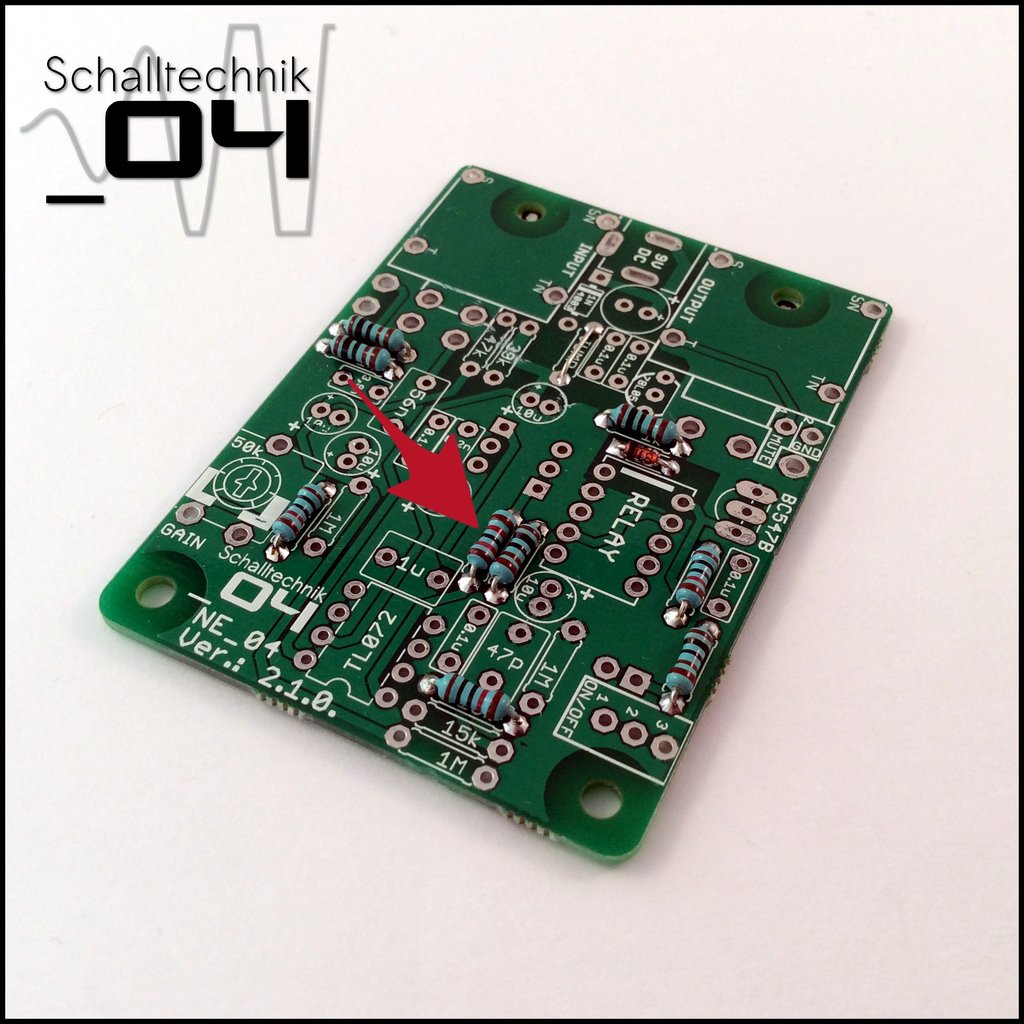
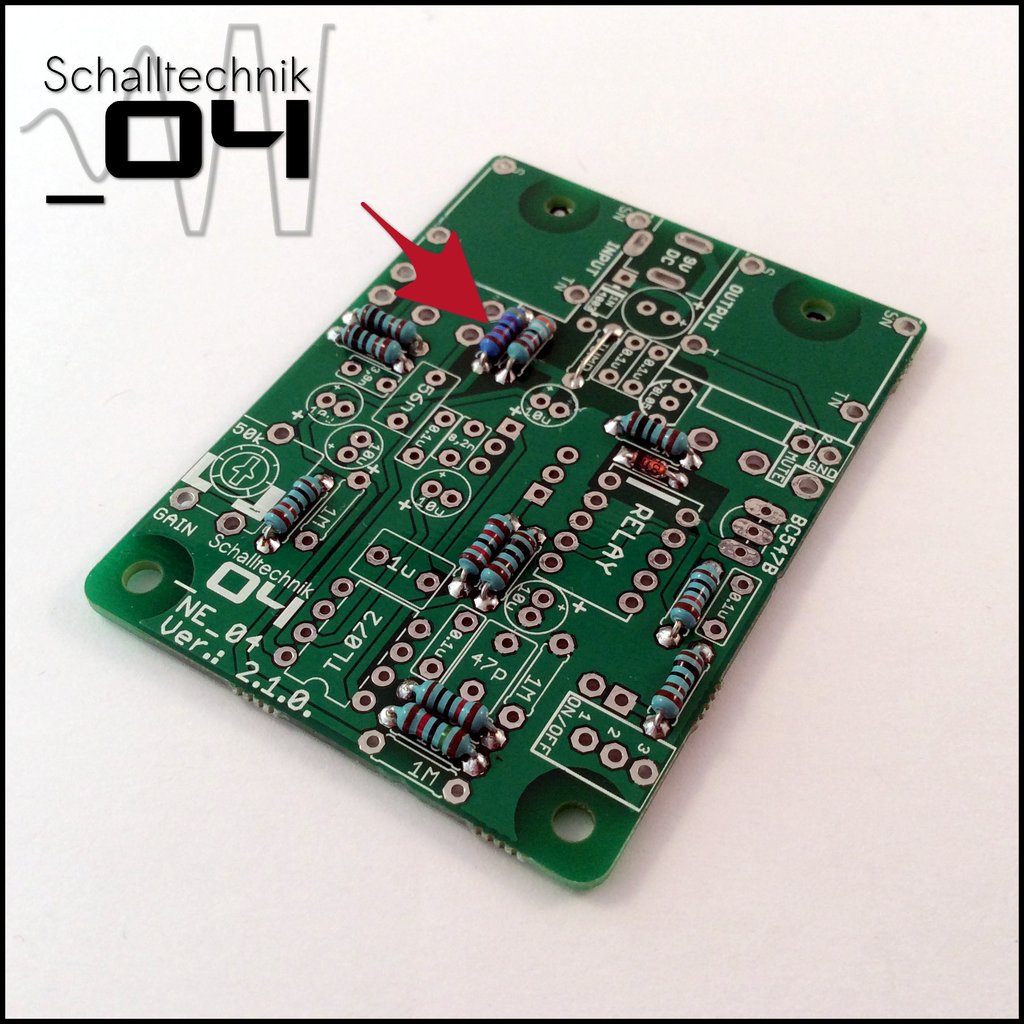
 Insert 39k resistor (1x) and solder it.
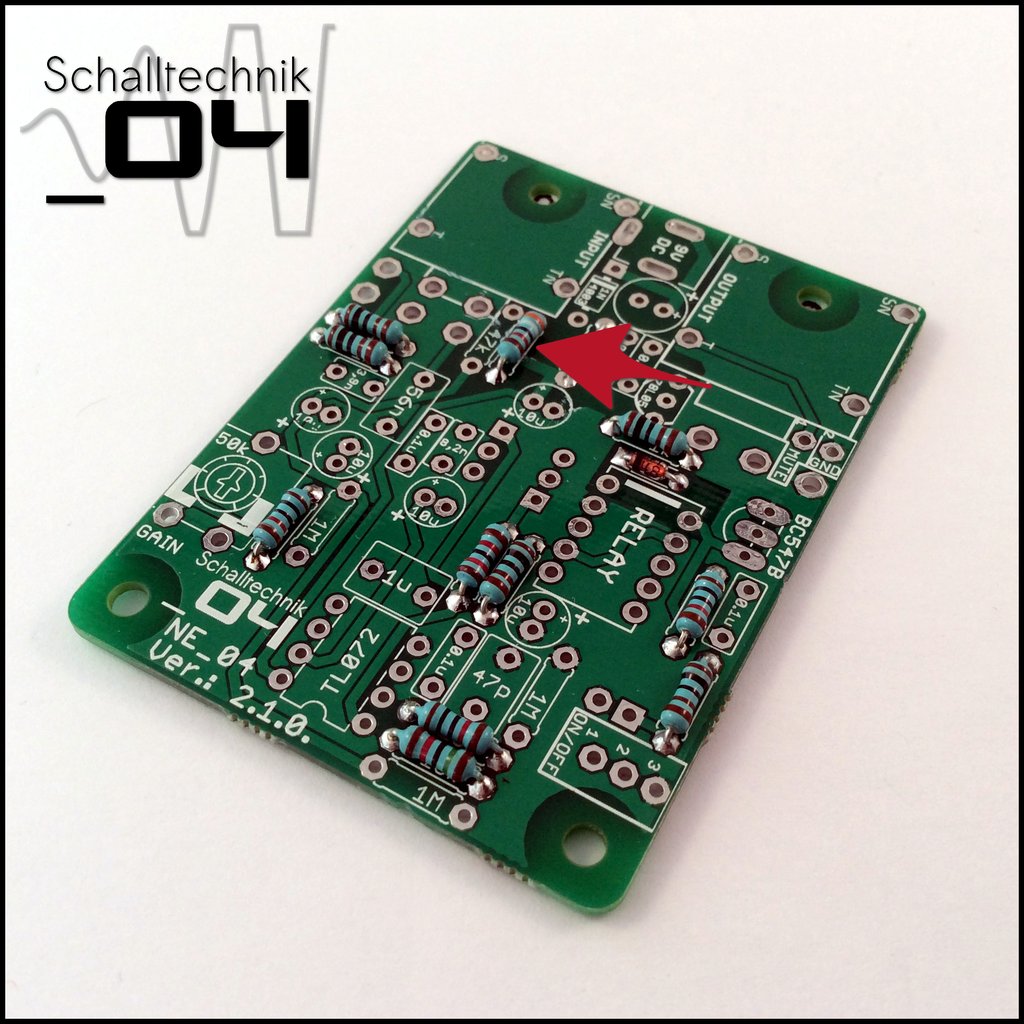
 Insert 47k resistor (1x) and solder it.
 Insert 1M resistors (3x) and solder them.
 Insert 1N4003 diode (1x) and solder it. Align correctly!
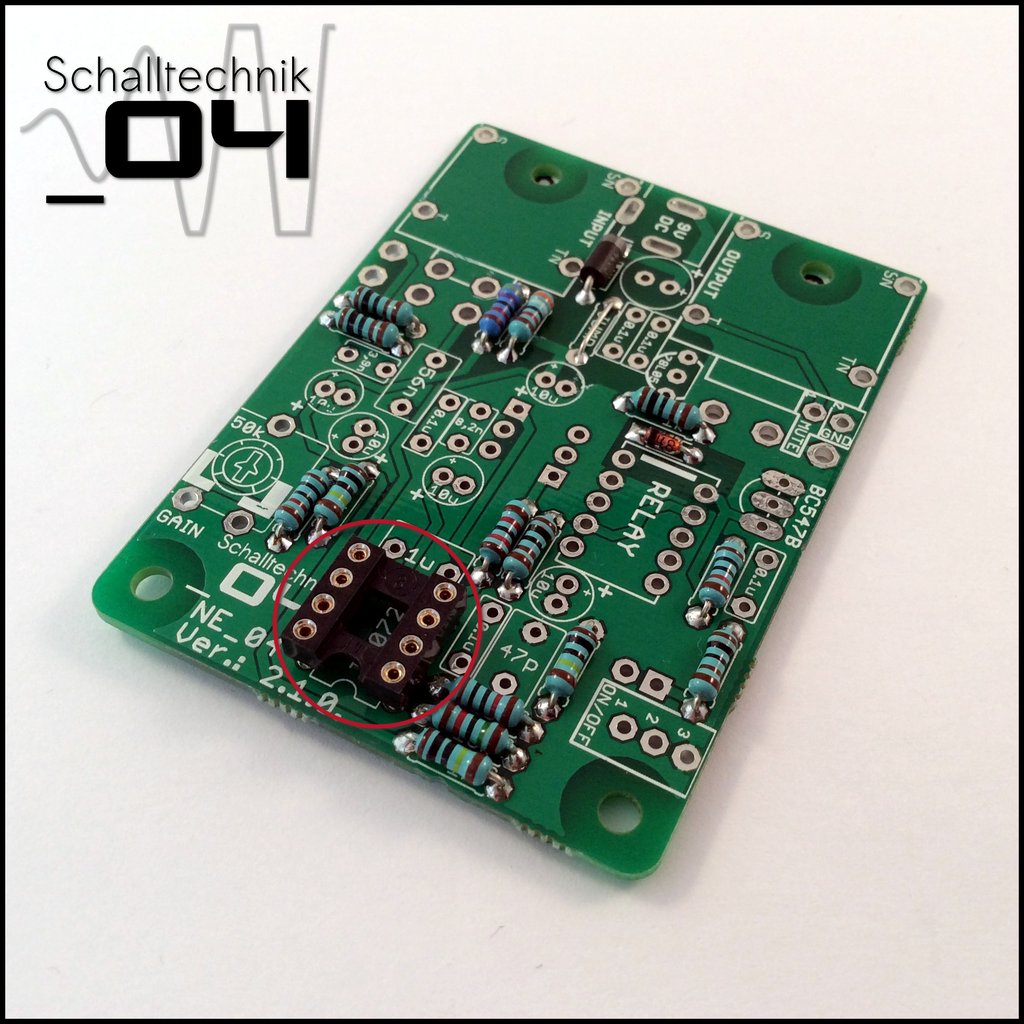 Insert 8-Pin DIL-Socket (1x) and solder it. Align correctly!