Drilling
Contents
Everything beginns with the enclosure. To drill the enclosure use this template:
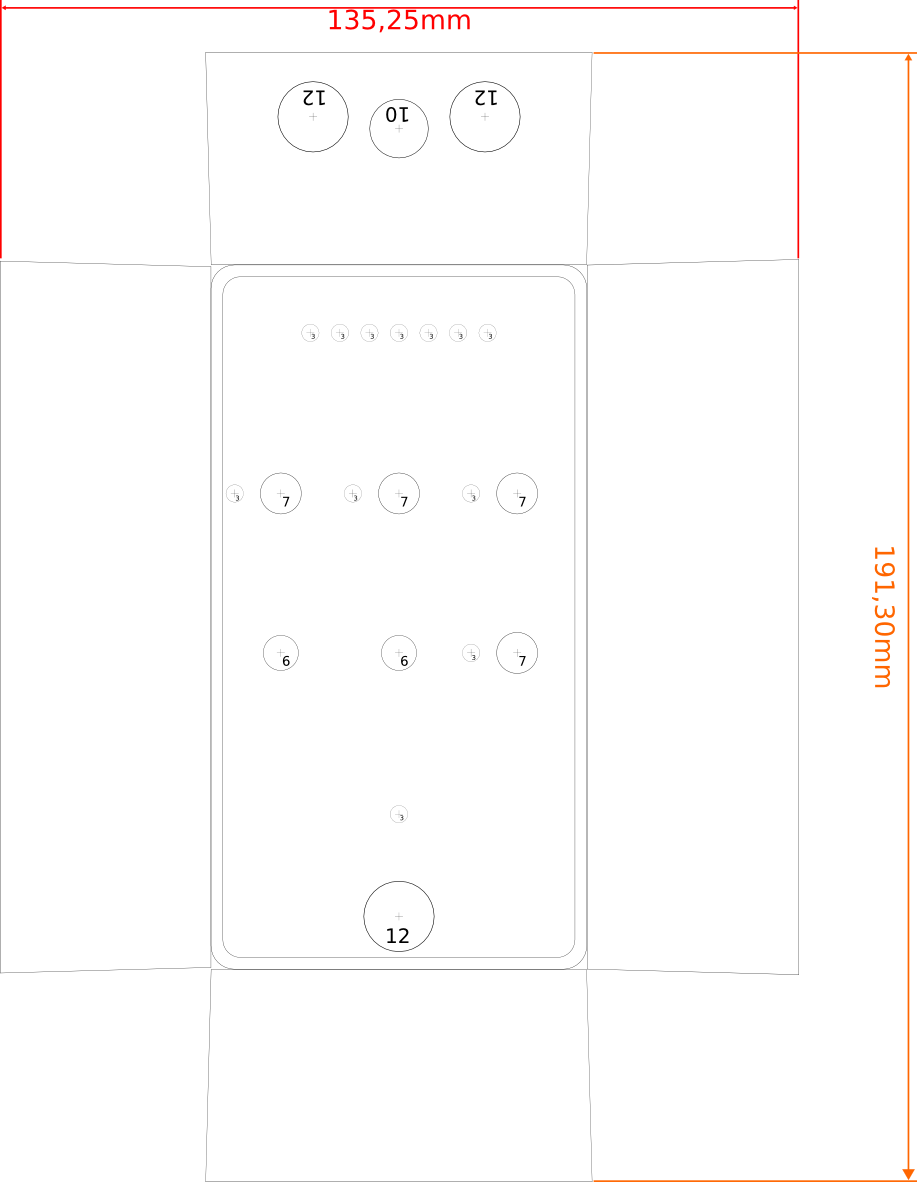
As an alternativ a drawing of the dimensions:
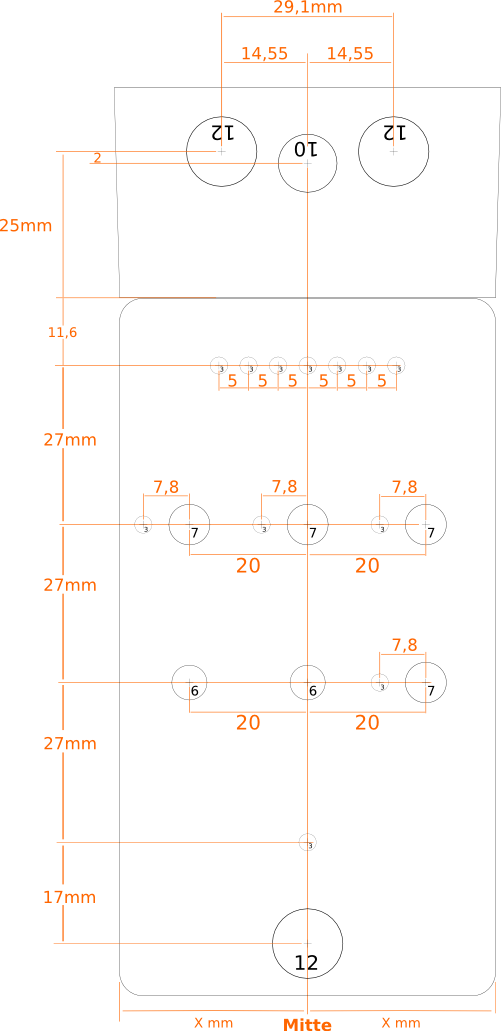
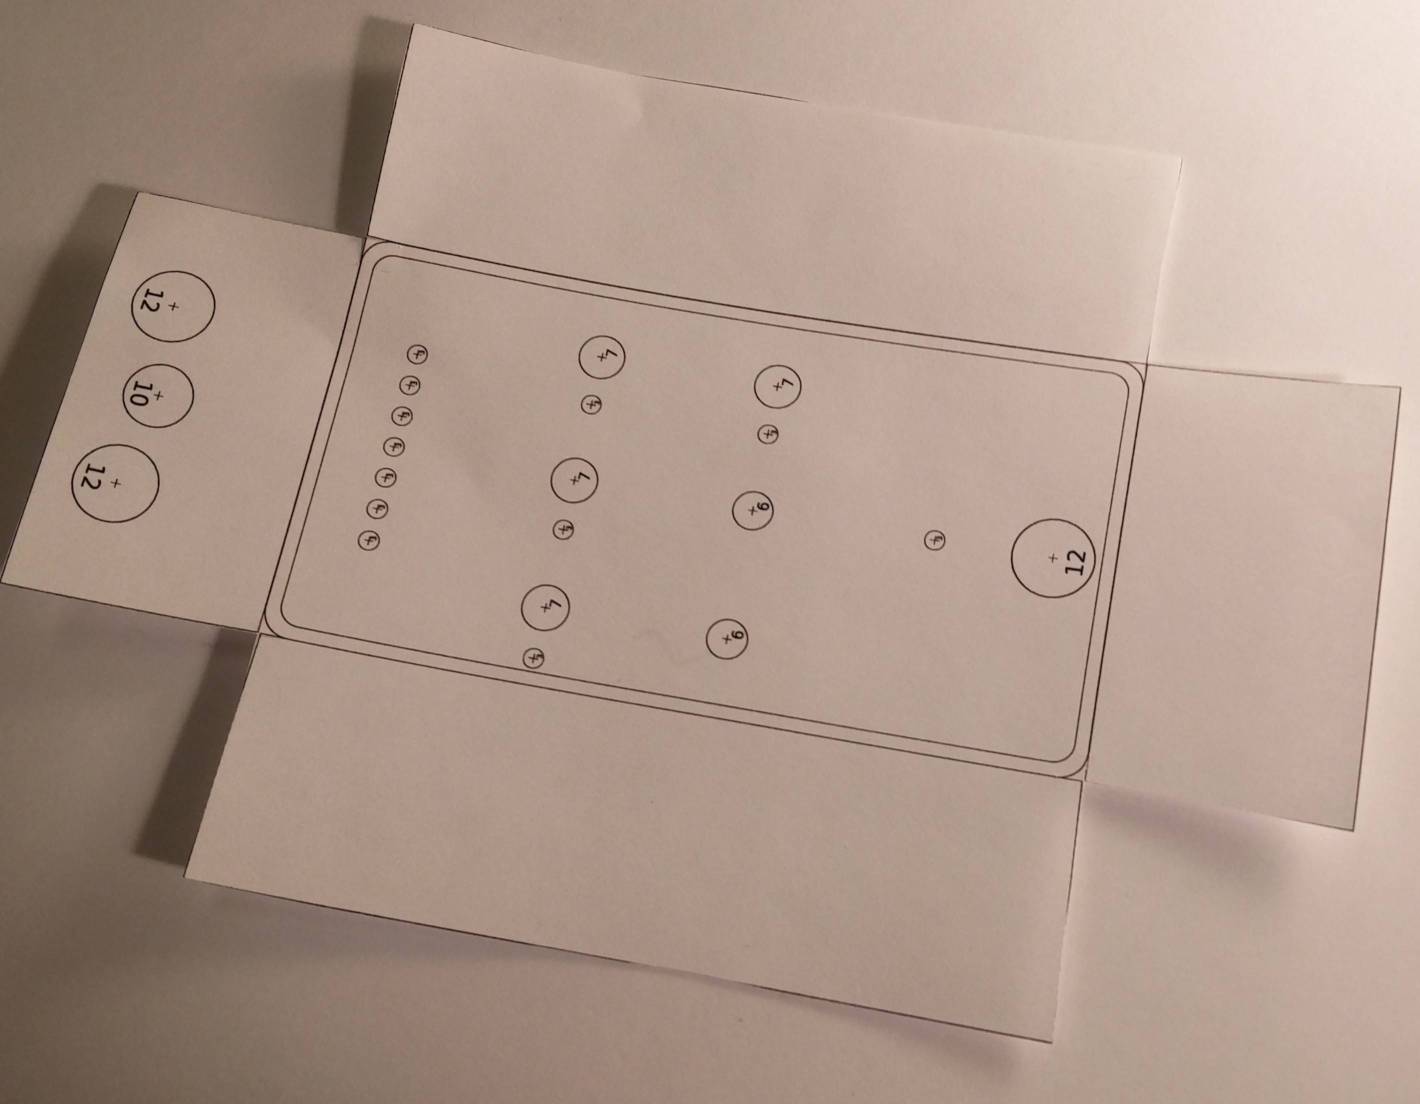
Depending on the accuracy of your printer you have to modify the template. I use the scaling function of the printer driver. (If your printer tampers the picture horizontal and vertikal differently, you need to open the template with inkscape and correct it there)
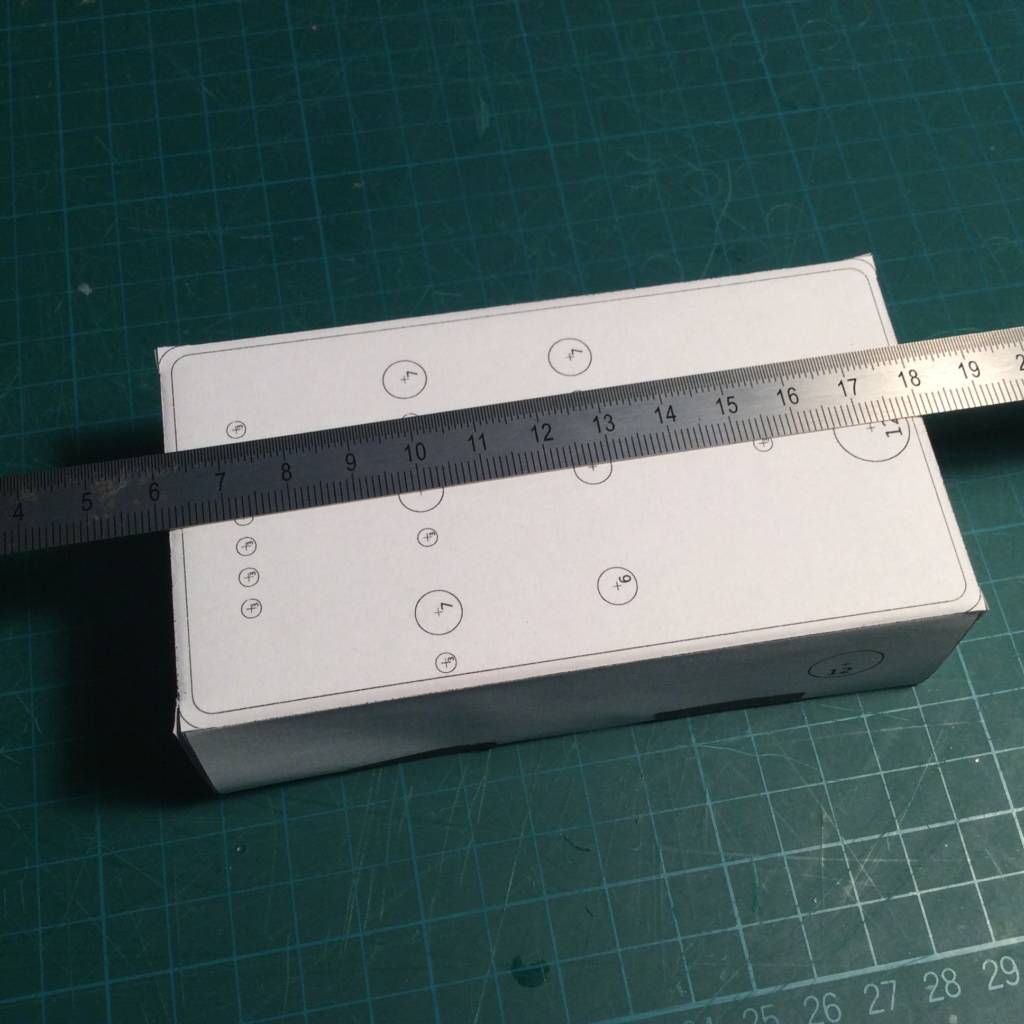
Cut out the template and fix it on the enclosure with tape:
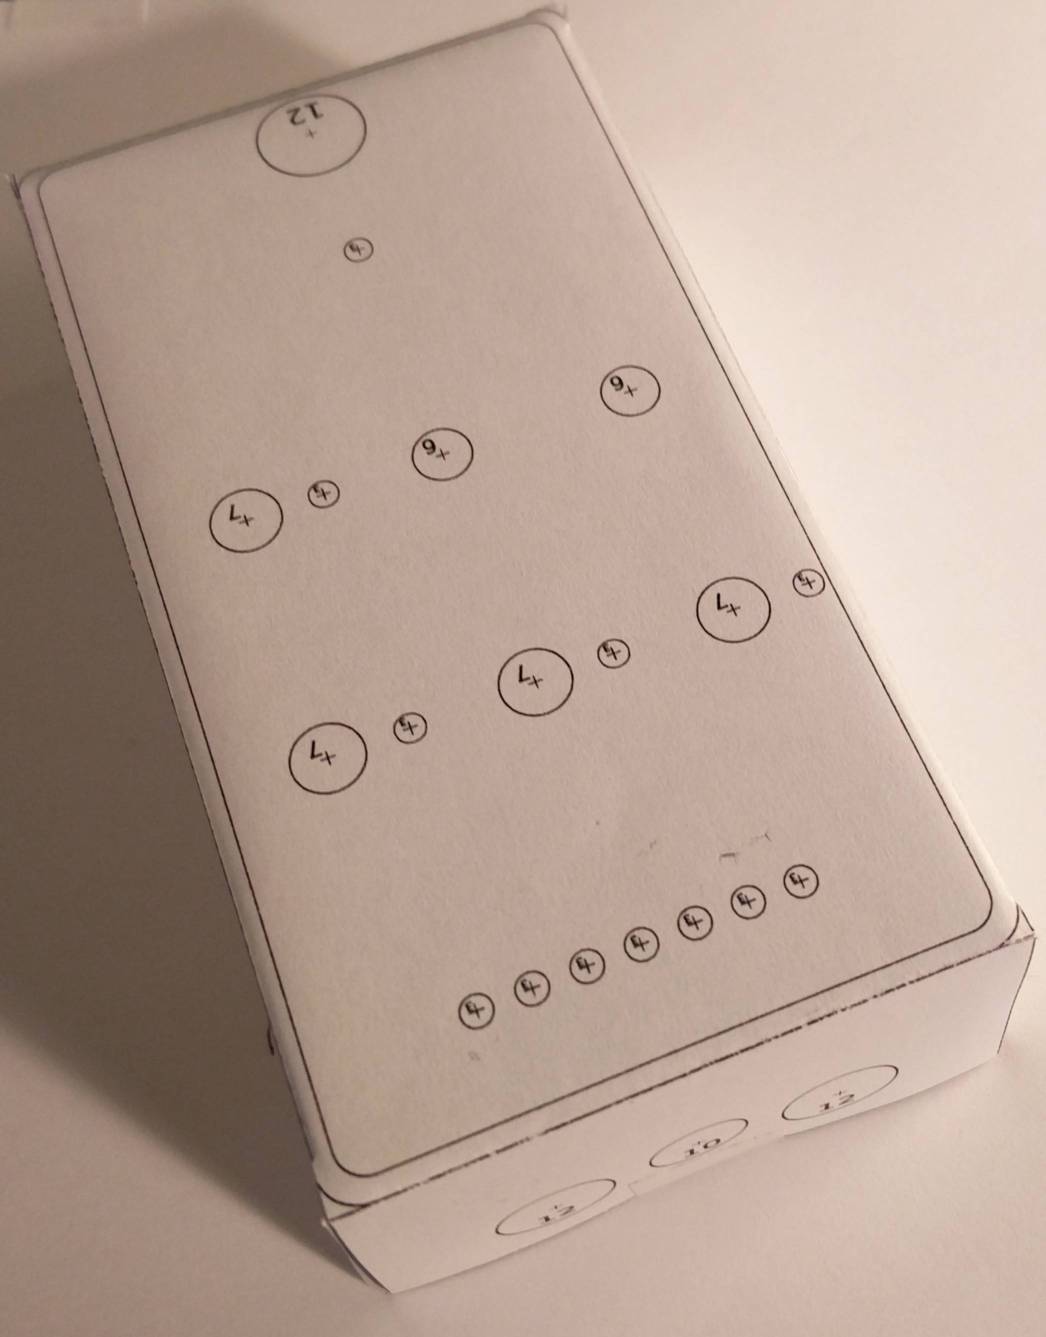
Now you can check if your printer worked exact. Distance between the pots: 20mm

Distance between the pots: 27mm
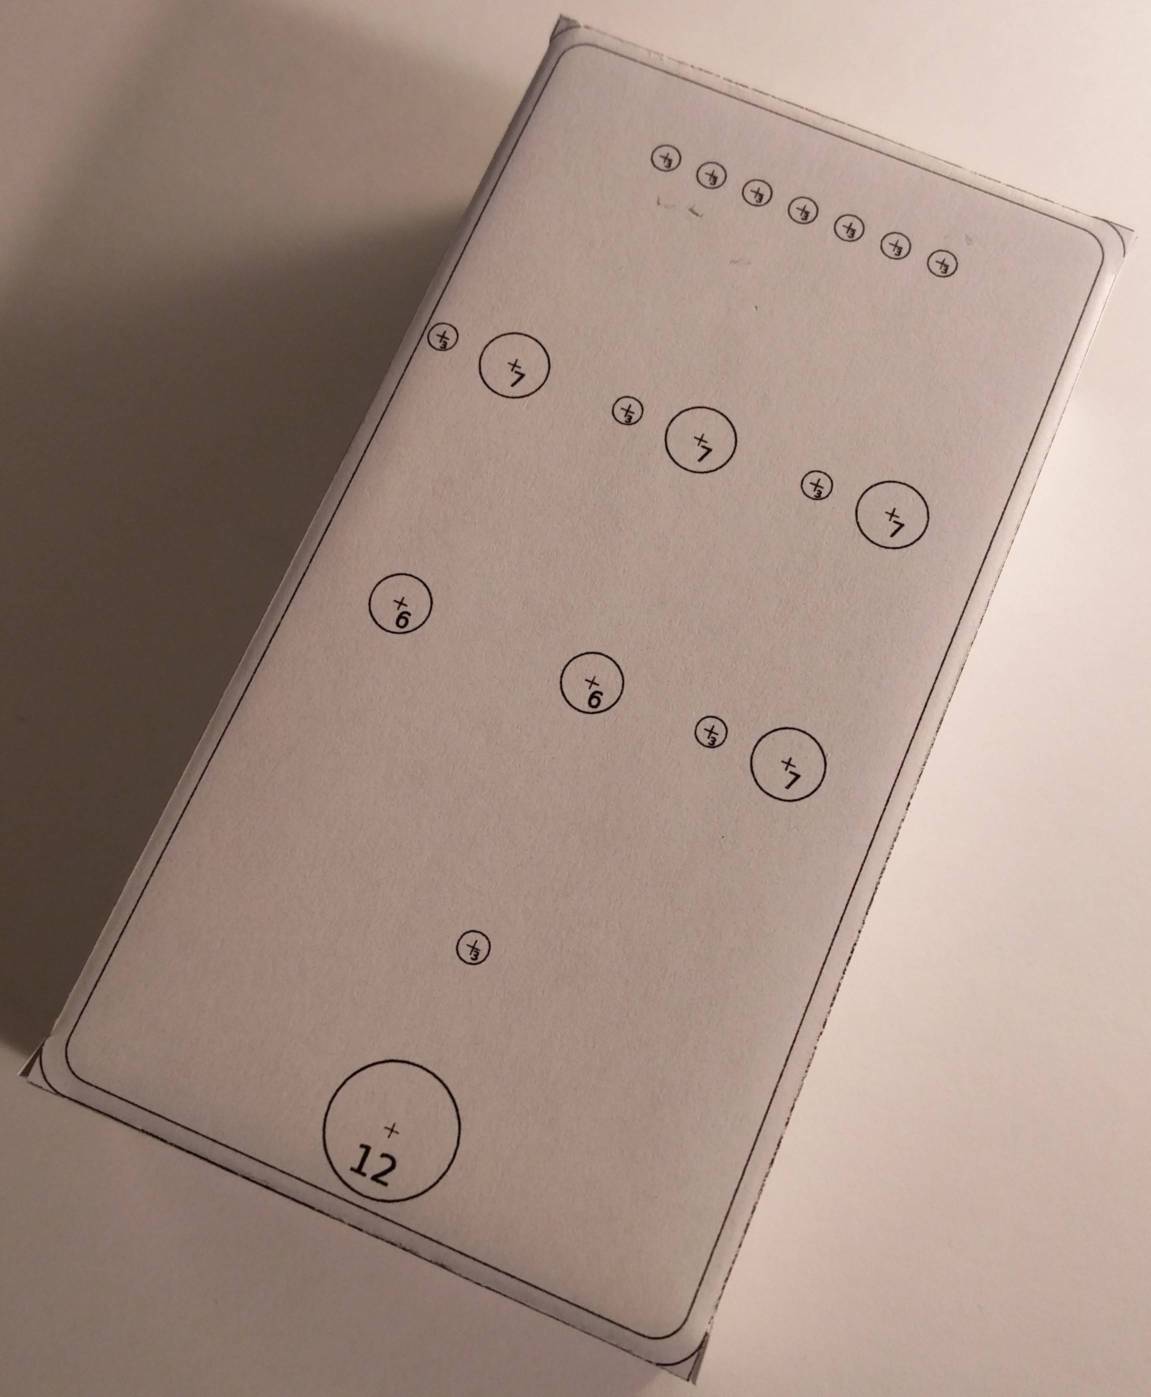
Afterwards corn the holes in the center and drill the holes.
This is what it looks like after drilling:
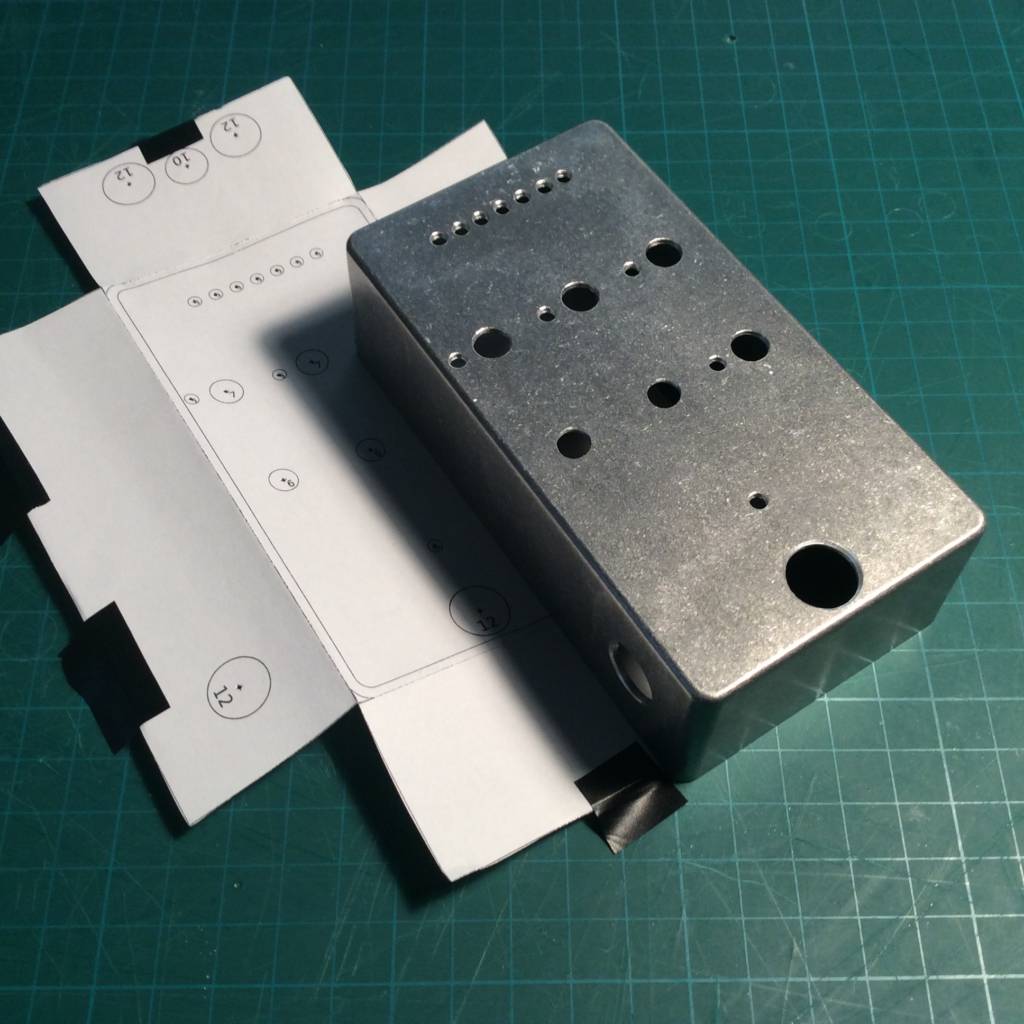
(Note: on the picture you see one of the first pumpernickel with sidechain drill on the side. Those aren’t needed anymore)
Post drilling check, if everything fits!
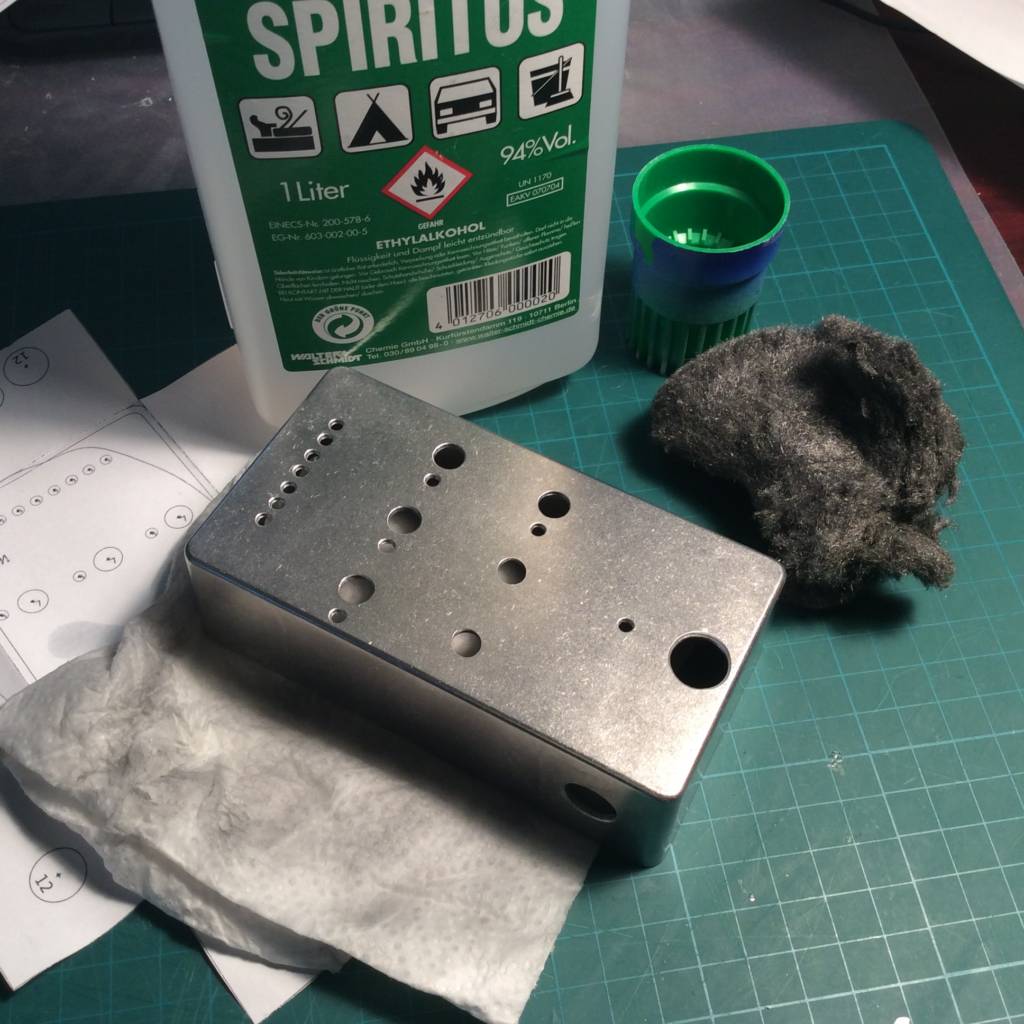
Before painting grind the enclosure with steel wool. The particals of the wool can be washed away under water.
The enclosure seems to be clean but if you check it with grain alcohol and a paper towel you will see that there’s still much dirt on it.
Just before priming the enclosure I clean it again. This time with break cleaner, so it’s absolutly free from grease.